Thursday, December 15, 2011

Blackwork - Fighting To Keep It Together

I finished this blackwork piece just yesterday.
I love working with tiny beads and YLI thread.
My bead collection is expanding so I have the colors I wanted for this piece.
The title, 'Fighting to Keep It Together' as alot of meaning for me at this point in my life.
I will be starting my next project today. It is going to be a larger Hardanger piece. Merry Christmas to all!

Sunday, November 20, 2011

Hardanger Creamer and Sugar Mat

I really liked this little hardanger kit! Even though I have been doing some hardanger work, I picked up quite alot and got to practice the technique.


The instructions were very easy to follow.


And as per the instructions, I went around the whole piece with small, close stitches on my sewing machine. This is to help the piece from becoming unraveled around the edges.


The kit is available from Nordic Needle and I do recommend this particular kit, hardanger and Nordic Needle!

I'm on my next piece...a blackwork piece that isn't black. I will, of course, be adding lots of little beads!

Thursday, November 3, 2011

Special Project - 'Motorcycle Towel'

I haven't posted for awhile but I have been stitching. I designed and stitched a special project. A 'Motorcycle Towel'. I'm a big fan of 'bath sheets' and this thing is the largest I've ever seen!


As the name of this project indicates, the theme is 'Motorcycle'. But not just any motorcycle....the BMW R1200C...my hubby's love!


He loves to ride in the Alps and over the mountain passes.


He has also been known to feel the heat of the Arizona desert.


The R1200C model isn't made anymore but if you would see his, you would think that it's new.
I found just about the perfect color match but the stitching doesn't show the shine!


And yes, he is going to use the towel. If you ever receive handstitched towels or napkins or a tablecloth, please use them. I've made many towels and such things and given them as gifts. They normally end up laying in a drawer somewhere because my loved ones don't want to 'ruin' them...please USE them! Those kinds of presents are given so the person can enjoy them and they can't be enjoyed when they lay in a drawer, wrapped up in tissue paper.
So...I'm already onto the next project...I hope your projects are coming along nicely, too!

Sunday, October 2, 2011

Cow Drive through the Austrian Town of Krimml

If you like this, you may enjoy more photos from our recent Austrian vacation. Please visit my other blog, The Camera Lenz, to view a newly posted slideshow.

Thursday, September 8, 2011

Schwalm Embroidery

Yes, Susan, you were absolutely correct....Schwalm is definitely something I will be able to get into!


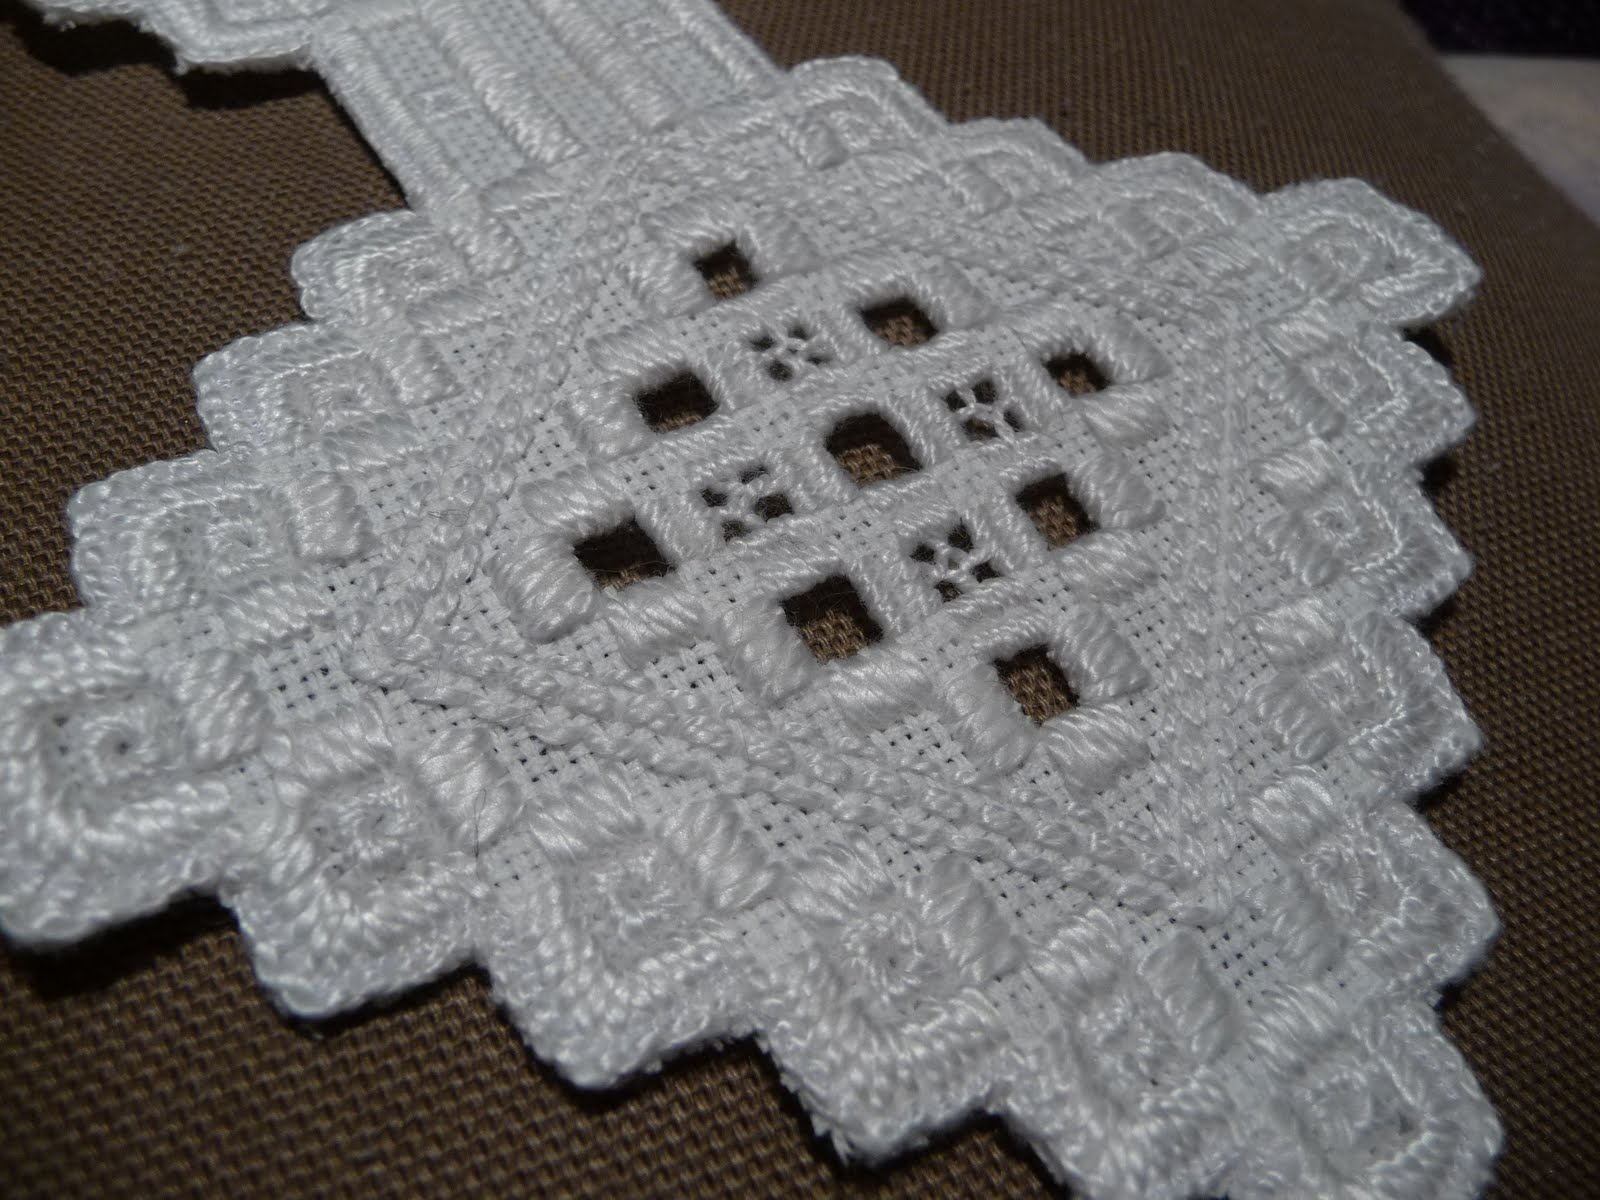
The little Karen Buell Design Hearts and Flowers kit was perfect for an introduction to this technique.


OK, it isn't perfect but I did get the hang of it relatively quickly. And of course I love the openwork.


Being an old-time 'counter', not counting is still a bit difficult. I can't seem to get symetrical things symetric. But this introduction was just to see if I even liked the technique.


And I do! And it's fun! The 'white on white' is something different. And there the edges of the center flower and the heart had several different stitches going around it so it may look sort of 'sloppy'. But I can fix things like that!

I took the pictures before I washed it. I had to wash it because, even though I only lightly penciled in the design, you could still see lines. I know there are erasable or washable markers but I don't have one. So....Susan, if you are looking for the perfect Christmas present........

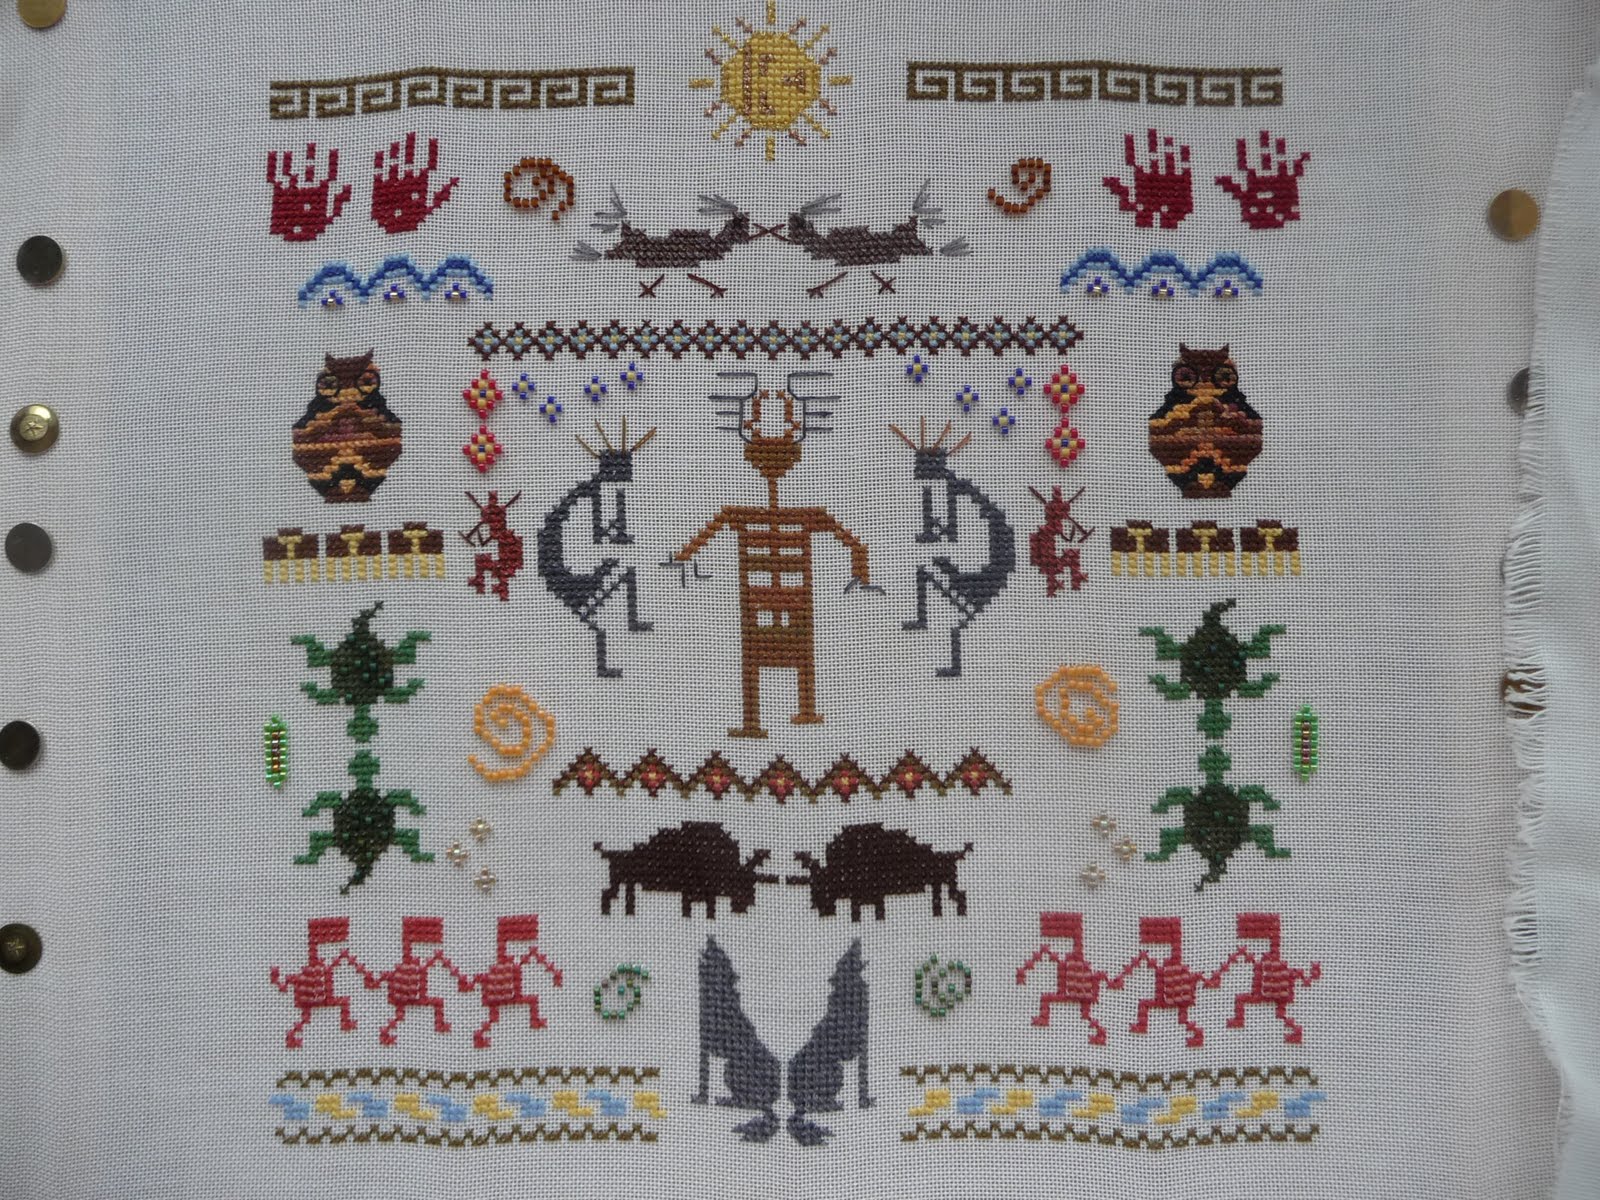
I'm starting a special project this evening. It's going to be cross-stitch but it's going to be GREAT!! Stay tuned.......

Monday, August 29, 2011

Crewel Embroidery

Yet another kit done! My introduction to Crewel Embroidery. I have this in a little slideshow with 5 pictures of the completed Janlynn Hummingbirds crewel embroidery kit. (You can click on the picture which opens another window and then click on "full screen" in the upper left to view it close-up). What do I think about crewelwork? Well, this was an introduction. The kit was okay but nothing to write home about. The pattern was not stamped straight on the material so the straight border lines weren't always on the stamped pattern causing the markings to show. The material was not correct for crewelwork, I noticed that right off the bat. The instructions were alright I guess but I still referred to my own stitch books for explanations. The actual stitching was okay...I don't like stitching with yarn so crewel might not be something that I will do alot of in the future. But I would certainly like to try it again. The next time though I will select the material! And yes, it will be linen twill. So...what do you think of the stitching? I don't have anything to compare it to so your comments will be most appreciated!


I'm on to giving Schwalm a try...I already like the technique!

Thursday, August 4, 2011

Brazilian Embroidery

Here it is! My first attempt at Brazilian Embroidery!


I left it in the hoop to take the pictures. And no, I haven't washed it, as you can see by the little blue pattern lines. I sort of have a problem with the thought of washing it even though it says you can. So I thought I'd better get some pictures before, just in case it gets ruined!


So what do I think about this technique? Well, I don't think it will become my "favorite", that's for sure. It's interesting and it goes pretty fast. I learned alot with this little kit. But.....the thread. It's so slippery and unravels so easily. It's not the easiest stuff to work with and I sort of like concentrating on the stitching, not the thread.


I have to say that I was very psyched about the fact that all the stitches used in this kit I had already done while doing Sharon B's TAST. It was really cool actually using what I learned!

I'm on to the crewel kit. In the stumpwork kit instructions, it said that you used crewel so I figured I'd better do that one first! Yes...I'm having lots and lots of fun!!

Saturday, July 30, 2011

Finished Egyptian Sun God

I finished the Egyptian Sun God, original design by Carol Leather (X-Calibre Designs). I embellished it with different beads and added a touch of color as well.


It took a total of about 2 months to finish.


It's stitched on 40count linen and I used a variety of different threads.


It's very large especially considering that it's on 40count!


I have posted a slideshow on The Camera Lenz if you would like to see more images.

In the mean time, I've started a little Brazilian Embroidery kit that I recently purchased at my favorite online needlework store The NordicNeedle. They had several different kits on sale that looked perfect for trying out new techniques. I wanted to try the techniques to see if I like them. I've started with the Brazilian. I also have kits for schwalm, crewel and stumpwork! I'm pretty excited about trying out new things. I'll post and let you know how things are going!

Wednesday, May 25, 2011

Progress on Egyptian Sun God

This is the progress I've made on the Egyptian Sun God this past month. I'm having a great time doing this! I've tweaked the pattern quite a bit as far as technique and color go.


The pattern actually had no color except for the gold and black. I added the purple (what other color would it be!?)


The gold thread is not so easy to work with but I like the effects.


I'm couching the wall design. I love couching and am happy to have the perfect opportunity to use it.


Of course, none of the outlining is complete and the crown piece isn't done either. It's definitely going to have beads! It's a fairly large piece, the design being something like 10-12 inches tall. Don't forget either, I'm doing it on 40 count linen! Click on any of the photos to get a closer look.

One other thing....no comments from the peanut gallery on his "elephant foot". I'm absolutely sure I can repair it!

Wednesday, April 27, 2011

Egyptian Sun God Blackwork

This is the piece I am working on now. It's called Egyptian Sun God, designed by Carol Leather. I am doing it on 40count lambswool linen. Call me crazy but I absolutely love this kind of stitching! I put a penny in the picture so you can see how fine the stitching is. I'll post detailed photos later.


I've experimented with lots of techniques but, for some reason, this seems to best fit me. I work on it just about every day for a couple/few hours. The above shows my progress after 2 weeks. Yes, it's slow going. Yes, that's quite alright with me!

Saturday, April 16, 2011

Blackwork Butterfly

I recently finished this piece, a blackwork butterfly designed by Karen Buell. I don't even remember when or where I got it but, since I had it, I figured I might as well do it.

It was a pretty fun piece as far as the stitching goes but I have a real problem with the fact that it is not symetrical! I tried, I really did. I was very aware that the design and picture of the finished piece that came with the pattern were not symetrical either but....I just really wanted it to be even on both sides!

I like the way it turned out and I am accepting the fact that nature isn't necessarily symetrical. But I think I may be sticking to other kinds of designs from now on!


Gift for Sonya

This little piece I did out of love. Love for the desert, for cacti and most definitely love for my sister Sonya. I made it to say "thank you" to her...for years of support, help, and "taking care" of me. I've lived outside the States for over 20years but she's always made me feel like I'm still part and always close. Thanks Sonya!


Sunday, March 20, 2011

Hardanger Spring Piece

Here's my latest finish. It's my own design. There are close-ups as well. Enjoy!


Wednesday, March 16, 2011

Cliff Dwellers

I finished this last month. Obviously it was inspired by our trip out west. It's a simple piece, just cross stitch with beading, that reflects the inspiration I felt in southwestern Indian art.


Below are some close ups of some of the details.


Each motive was placed in accordance with the cliff dwellers in the middle. Earth beings below and sky beings above. The hand prints represent earth, air, fire and water. In different Indian lore, it can also represent the four directions and the four colors.

Monday, February 28, 2011

Soap Project - or Things Not To Try

In August with my parents were here, my mother and I started my soap project. I was so sure that some way, I could melt down all the little slivers of left-over soap and mold it into new bars of soap. Although all my research pointed toward a disastrous end, I was so sure I could figure out a way. My mom and I worked and worked at trying to melt those stupid slivers. It just wasn't working. No matter what we did, the soap wasn't really melting and it was, as we thought it would be, pretty much a flop. And when we tried to let it cool down and solidify, it wasn't doing that either so I shoved the pan full of the half melted soap somewhere and forgot about it until January. When I dug the pan back out, I found that the half melted soap actually had solitified and I could cut it into pieces. I used a grater to shave off the rough edges and there actually ended up being a couple of pieces that stayed together well enough to use!


But, no, this wasn't good enough. I still had lots of slivers left over. So I thought if I used the grater and melted down the shavings, it would work even better! Here endeth the lesson...do NOT attempt this. It doesn't work and it is not worth the effort....or the smell in the house.

If you have to use the slivers, put them in an old knee-high or in a net or something and just use them that way.
I've been busy sewing (I think I'll stick to it from now on and not try any more weird experiments for awhile!) and I'll post my newly finished pieces soon.